Pick and place feature
To create a pick and place feature, you specify a location for the construction feature on your model and Pro/ENGINEER places it at that location. The system determines the feature geometry according to the type of feature that you select. To place the feature on your model, specify appropriate placement references and provide any required dimensions.
NOTE:
Placement references of pick and place feature are important for two reasons. First, a feature's existence is dependent on the existence of the placement references. Second, the feature behaves parametrically with respect to the placement references (that is, if the placement reference moves, the feature also moves).Choosing Hidden or Small References
In many cases, you want to select a reference for a feature that is hidden behind other features or is very small. You can rotate the model or zoom in, but this additional effort is unnecessary. Pro/ENGINEER has a tool that allows you to browse through references until you reach the desired one. When you place the cursor over a surface and select it using die Query Select option, you can browse through references that lie on or near the intersection path of the cursor normal to the screen. Using options such as Next, Previous, and Accept, you can identify desired references.
Through the Environment dialog box, you can also access another browsing tool for location features such as a placement plane or dimensioning surface. Rather than choosing Next to sequentially review the references, you can use Query Bin to directly select the desired entity or browse through only those that seem appropriate.
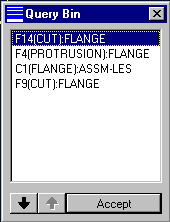
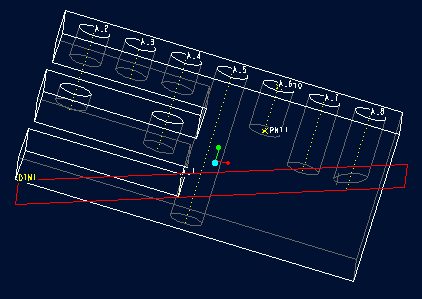
Query Bin Dialog Box
Creating the Straight Hole Feature
Pro/ENGINEER creates all straight holes with a constant diameter. A hole feature
always removes material from your model.
Placement Options
To place the reference on your model, you can choose from the following placement type locations in the PLACEMENT menu:
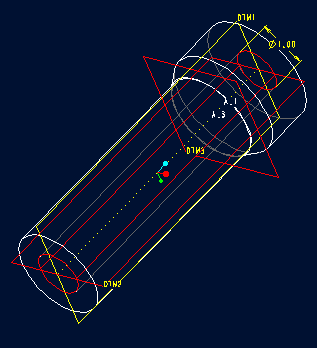
![]() Linear — Places the hole on a plane. Dimensions the center of the hole from two surface of edge using linear dimensions.
Linear — Places the hole on a plane. Dimensions the center of the hole from two surface of edge using linear dimensions.
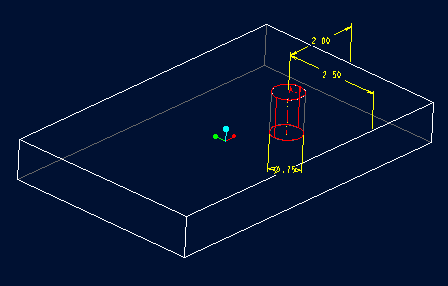
Liner Hole
![]() Radial — Places the hole with respect to an axis using polar dimensions on a plane, cylinder, or cone. Radial holes placed on a plane have the following dimensioning scheme types:
Radial — Places the hole with respect to an axis using polar dimensions on a plane, cylinder, or cone. Radial holes placed on a plane have the following dimensioning scheme types:
![]() Diameter — Uses a diameter dimension and displays a circle.
Diameter — Uses a diameter dimension and displays a circle.
![]() Radius — Uses a radius dimension and displays a circle.
Radius — Uses a radius dimension and displays a circle.
![]() Linear - Uses a linear dimension.
Linear - Uses a linear dimension.
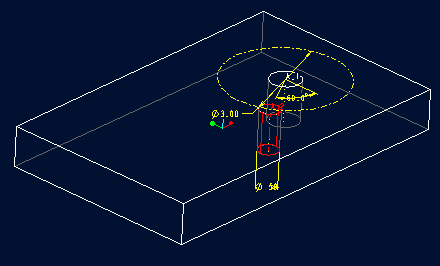
Radial Holes on a Plane
When you place a hole on the surface of a cone or cylinder, you must provide additional information; however, you do not have to specify a radius, diameter, or linear type to locate the hole.
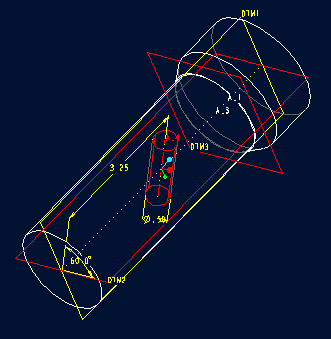
Radial Holes on a Cylinder
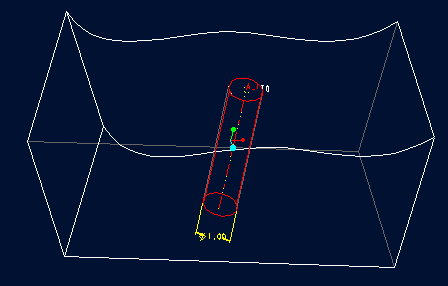
![]() Coaxial — Places the hole coaxially using an existing axis. Does not create placement dimensions, only a diameter dimension for the hole itself.
Coaxial — Places the hole coaxially using an existing axis. Does not create placement dimensions, only a diameter dimension for the hole itself.
Coaxial Hole
![]() On Point - Places the center of the hole directly on an on surface datum point. The axis of the hole is normal to the placement surface.
On Point - Places the center of the hole directly on an on surface datum point. The axis of the hole is normal to the placement surface.
On Point Hole
Side Options
You can also create the hole from either side of the placement plane or from both sides using the One Side and Both Sides options in the SIDES menu, respectively.
One Side
Both Side Options
Depth Options
The system determines how deep to create the hole based on the depth specification. The SPEC TO menu (and SPEC FROM menu if you use Both Sides) contains the following depth options:
![]() Blind - Creates a hole with a flat bottom to a specified depth.
Blind - Creates a hole with a flat bottom to a specified depth.
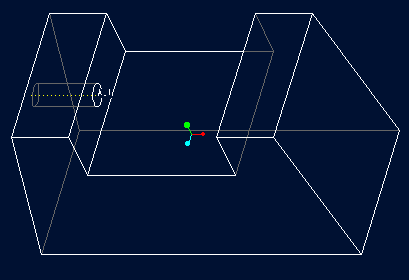
![]() Thru Next - Creates a hole that continues until it reaches the next part surfaces.
Thru Next - Creates a hole that continues until it reaches the next part surfaces.
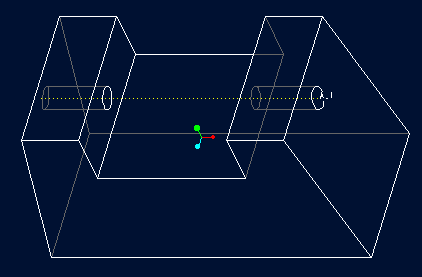
![]() Thru All — Creates a hole that in intersects all surfaces.
Thru All — Creates a hole that in intersects all surfaces.
![]() Thru Until — Creates a hole that goes through all surfaces until it reaches a specified surface.
Thru Until — Creates a hole that goes through all surfaces until it reaches a specified surface.
![]() UpTo Pnt/Vtx - Creates a hole with a flat bottom that continues until it reaches a specified datum point or part vertex.
UpTo Pnt/Vtx - Creates a hole with a flat bottom that continues until it reaches a specified datum point or part vertex.
![]() UpToCurve — Creates a hole with a flat bottom that continues until it reaches specified datum curve that lies in a plane parallel to the hole placement
UpToCurve — Creates a hole with a flat bottom that continues until it reaches specified datum curve that lies in a plane parallel to the hole placement
![]() UpTo Surface — Extrudes a hole until the bottom conforms to the selected bounding surface.
UpTo Surface — Extrudes a hole until the bottom conforms to the selected bounding surface.
Hole Depth Options (Blind, Thru Next, Thru Until, Thru All, Up to Point, Up to Curve, Up to Surface)
Creating the Simple Edge Chain Round
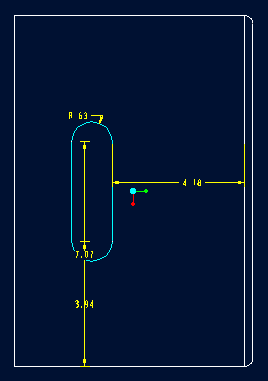
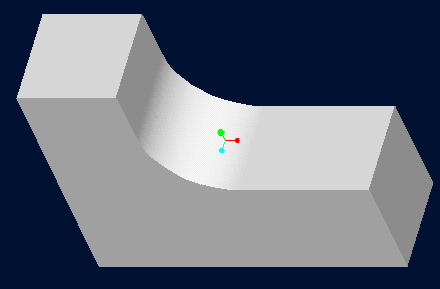
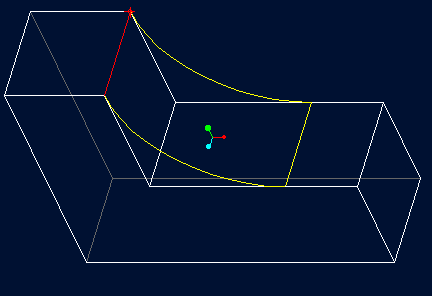
Round features create a fillet or rounded smooth transition with either a circular or conic profile between two adjacent surfaces. An edge round smooths the hard edges between adjacent surfaces. Round features can add or remove material, depending on the edge references selected. The placement references for an edge round are the model edge or edges.
In Pro/ENGINEER, you can use two types of rounds: simple and advanced. Simple rounds use the default round shape and transitions, while advanced rounds use user-defined round shapes, transitions, and an optional spine between round sets.
Radius Options
To define the radius of your round, you can use the following options:
![]() Constant — Assigns the same radius value to every selected edge.
Constant — Assigns the same radius value to every selected edge.
![]() Variable — Specifies radii at every selected edge at the endpoints and, optionally, at intermediate vertices along the edge being rounded. The intermediate vertices can include all of the edge vertices and additional datum points located along the edge.
Variable — Specifies radii at every selected edge at the endpoints and, optionally, at intermediate vertices along the edge being rounded. The intermediate vertices can include all of the edge vertices and additional datum points located along the edge.
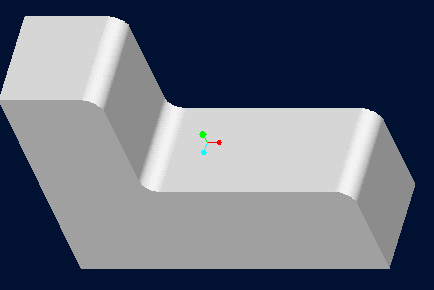
Constant Radius Rounds
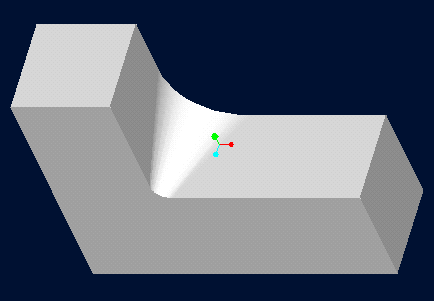
Variable Radius Round
![]() Full Round — Creates round that completely removes a model surface. You do not have to provide a radius value.
Full Round — Creates round that completely removes a model surface. You do not have to provide a radius value.
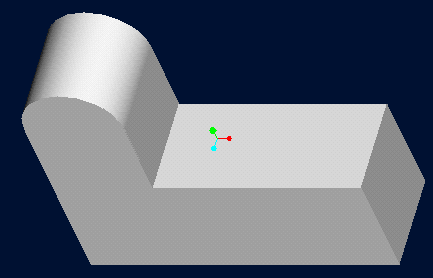
Full Round
NOTE:
You should create round features on your model as late in the design process as possible. Do not dimension other features to the edges or tangent edges of round features. This could create unwanted dependencies on the round feature by other features that may make feature manipulation more difficult later in the design process.

Cut Feature Dimensioned to the Edge Round
To specify the radius values, you can use the following options in the RADIUS TYPE menu:
![]() Enter — (default) Specifies a new radius value that does not appear in the menu. Use the <Esc> key to select other radius type options.
Enter — (default) Specifies a new radius value that does not appear in the menu. Use the <Esc> key to select other radius type options.
![]() Pick On Surf — Specifies a point on the adjacent surface that determines the radius value.
Pick On Surf — Specifies a point on the adjacent surface that determines the radius value.
![]() Thru Pnt/Vtx — Specifies datum point, vertex, curve, or edge end through which the radius of round should pass.
Thru Pnt/Vtx — Specifies datum point, vertex, curve, or edge end through which the radius of round should pass.
![]() Default Values- Specifies a radius value as the system default value or a previously entered radius value in the SEL VALUE menu.
Default Values- Specifies a radius value as the system default value or a previously entered radius value in the SEL VALUE menu.
Using the Pick On Surf Options
Using the Thru Pnt/Vtx Option
Creating an Edge Chamfer
An edge chamfer feature removes a flat section of material from a selected edge or edges to create a beveled surface between the two original surfaces common to the edges. In Pro/ENGINEER, you can use the following dimensioning schemes for edge chamfers:
![]() 45 x d — Used only on an edge formed by the intersection of two perpendicular surfaces. Creates the chamfer surface by measuring a distance "d" from the edge along the adjacent surfaces. You can modify only the "d" dimension.
45 x d — Used only on an edge formed by the intersection of two perpendicular surfaces. Creates the chamfer surface by measuring a distance "d" from the edge along the adjacent surfaces. You can modify only the "d" dimension.
![]() d x d — Creates the chamfer surface by measuring a distance "d" from the edge along the adjacent surfaces.
d x d — Creates the chamfer surface by measuring a distance "d" from the edge along the adjacent surfaces.
![]() d1 x d2 — Creates the chamfer surface by measuring a distance "d1" from the edge along one adjacent surface (the reference surface), and a distance "d2" from the edge along the other surface.
d1 x d2 — Creates the chamfer surface by measuring a distance "d1" from the edge along one adjacent surface (the reference surface), and a distance "d2" from the edge along the other surface.
![]() Ang x d — Creates the chamfer surface by measuring a distance "d" from the edge along one adjacent surface (the reference surface), and measuring an angle "ang" from the reference surface.
Ang x d — Creates the chamfer surface by measuring a distance "d" from the edge along one adjacent surface (the reference surface), and measuring an angle "ang" from the reference surface.
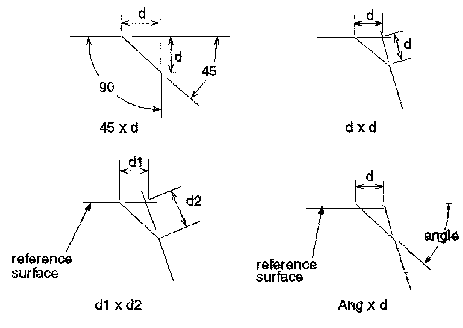
Edge Chamfer Dimensioning Schemes
NOTE:
When selecting circular edges for chamfers, Pro/ENGINEER only highlights one half of the edge. Since the system places the chamfer on the entire circular edge, you do not have to select the other half of the edge.